A Renter-Friendly Bedroom Redo
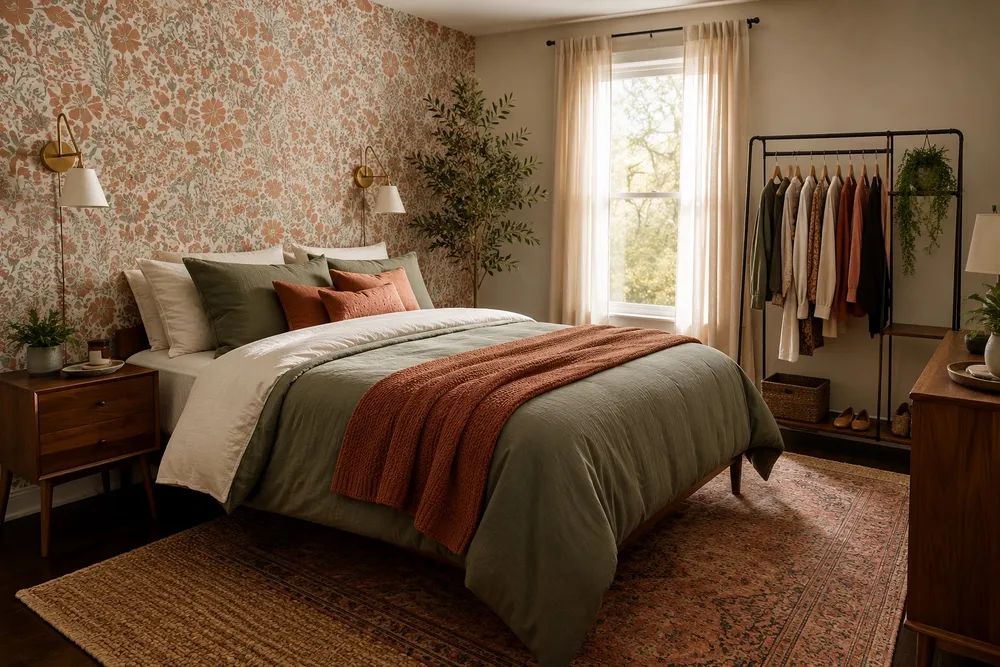
Renting shouldn’t mean living in a space that feels temporary. The challenge, of course, is that most of the biggest style upgrades — paint, built-ins, permanent fixtures — are off the table when you don’t own the walls.
The good news: a bedroom redo doesn’t actually need any of that. Here’s a step-by-step approach to transforming a rental bedroom using only things you can take with you when you move.
Step 1: Edit Before You Add
Before buying anything new, take everything off your nightstands, dresser, and walls. Rentals tend to accumulate decor in layers over time, and most rooms benefit more from removal than addition. Keep only what you’d choose again today.
Why this matters: A cluttered room makes even expensive decor look chaotic. A clean slate makes every new piece you add actually visible.
Step 2: Layer Textiles First
Textiles are the highest-impact, lowest-risk category for renters — no tools, no walls, fully reversible. Start here before anything else:
- Bedding — a duvet or quilt in a color that anchors the room’s palette
- Throw pillows — 2 to 3 in varying textures (linen, knit, velvet) rather than matching sets
- A throw blanket — draped, not folded, for a lived-in feel
- A rug — even a small one under the bed adds warmth instantly and covers worn rental flooring
Step 3: Add Light Without Touching the Ceiling
Most rental bedrooms come with a single, harsh overhead fixture. You don’t need an electrician to fix this — you need a floor lamp and a plug-in wall sconce. Plug-in sconces have come a long way and can be mounted with adhesive hooks or hung from a simple cord clip, no wiring required.
Tip: Warm-toned bulbs (2700K) make a huge difference in how “finished” a rental room feels compared to the cool white bulbs landlords often install.
Step 4: Use Removable Wall Solutions
Skip the paint, but don’t skip the walls entirely. A few renter-safe options:
- Removable wallpaper on a single accent wall (behind the headboard is the highest-impact spot)
- Command-strip hung art or mirrors — modern adhesive strips hold surprising weight
- A tapestry or fabric panel for texture without any wall damage at all
- Peel-and-stick molding for a “built-in” look around a window or doorway
Step 5: Make the Bed the Focal Point
In a rental, the bed is doing the most visual work in the room, so it deserves the most attention. A simple upholstered or wood headboard — many models lean against the wall and don’t need to be mounted — instantly elevates a bedroom more than almost any other single purchase.
Step 6: Add One “Why Is This Here” Piece
Every elevated room has at least one object that doesn’t serve an obvious function but adds personality — a sculptural vase, an oversized dried branch, a vintage frame with no photo in it. This is the detail that makes a room feel curated rather than furnished from a single catalog.
The Real Takeaway
None of these steps require a single hole in a wall you don’t own. Done together, they take a rental bedroom from “temporary” to “this is actually my room” — and every piece moves with you to the next place.